subject: How To Convert Blu Ray Disc Movie To General Video And Hd Video Formats [print this page] Now Blu Ray Disc becomes more and more popular, but if you have a Blu Ray Disk, what you need to do if you want to put Blu Ray Disk moive to your computer hard disk to watch at any time, or put on your portable devices?
There is no doubt that AVCware Blu Ray Ripper is very necessary, which can rip or convert Blu Ray movie to Standard-Definition as well as High-Definition video files and regular audios.
Now the following content will show how to convert Blu Ray Disc movie.
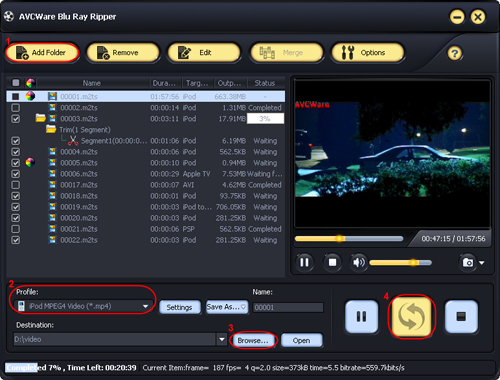
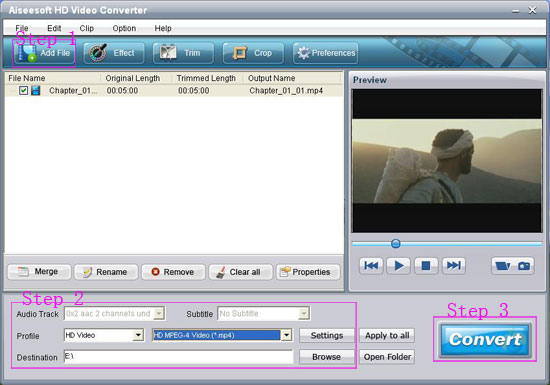
Insert a blu-ray disc, and click Add Folder button to select the inserted disc in the dialog box that opens, and load it.
Step 2: Select output video format
Select an output video format you want from the "Profile"drop-down list.
Tip: To adjust the output settings, click Settings button next to Profile drop-down list, and set the parameters of output format in the Advanced Profile Settings dialog box that opens.
Step 3: Set output destination
Select a destination folder by click the "Browse" button.
Tip: Before start to convert files, you can trim video, crop video screen, adjust and dd effects, and create watermark to colorize your output file.
Step 4: Start conversion
After finishing the above settings, click "Convert Checked Item(s)" button to start converting the files.
Tip: You can click Pause Checked Item(s) button to pause the converting process and Stop Checked Item(s) button to cancel the process as required.
The powerful editting funtions:
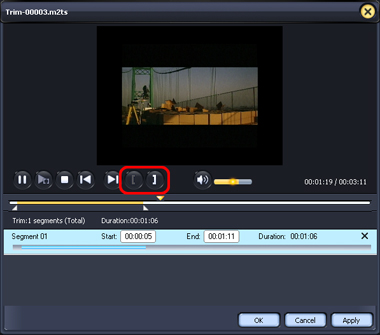
1 Trim
Click "Edit" button on the toolbar and choose Trim option to open Trim window, drag the slider or enter the time value you want in the Start and End textbox to adjust the position of start and end point, then click "ok" button.
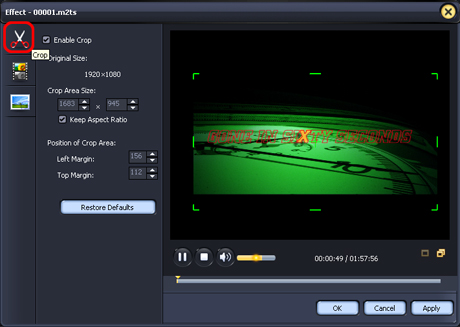
2 Crop
click "Edit" button on the toolbar and choose Effect option to open Effect window. Click Crop button in the left window to open crop setting panel. You can click the arrow to crop, or drag the central handle and surrounding handles in the preview window to adjust the crop area.
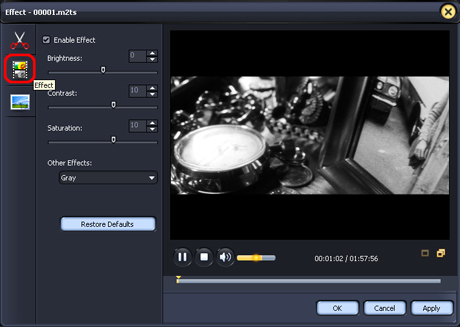
3. Effect
click "Edit" button on the toolbar and choose Effect option to open Effect window, then click Effect button in the left window to go to the effect setting panel. You can drag the control slider or enter a value to set the Brightness, Contrast, Saturation and Other Effects.
Tip: Click Restore Defaults button, to restore the default settings.
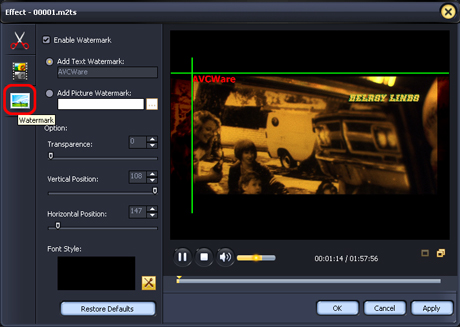
4. Create Watermark
Click "Edit" button on the toolbar and choose Effect option to open Effect window. Click Watermark button in the left window to open watermark setting panel, then check Enable Watermark check box..
Add text watermark
1.Click Add Text Watermark option.
2. Enter the text for watermark in the Input Watermark Text textbox.
3. Then adjust the watermark options by set watermark Transparence, Vertical Position, Horizontal Position and Font Style.
Add picture watermark
1. Click Add Picture Watermark option.
2. Select a picture for the watermark from the window that opens.
3. Then adjust the watermark options by set watermark Transparence, Vertical Position, Horizontal Position and Font Style.
Tips:
1.Click Restore Defaults button, to restore the default settings.
2.Adjust watermark vertical or horizontal position by drag and drop: drag the horizontal or vertical green line up and down in the preview window, to set the vertical or horizontal position of the watermark.
And there is also a HD Video Converter, which enables people to convert HD video to general video, convert general video to HD video, or among HD videos.
Now the following will show how to use this program